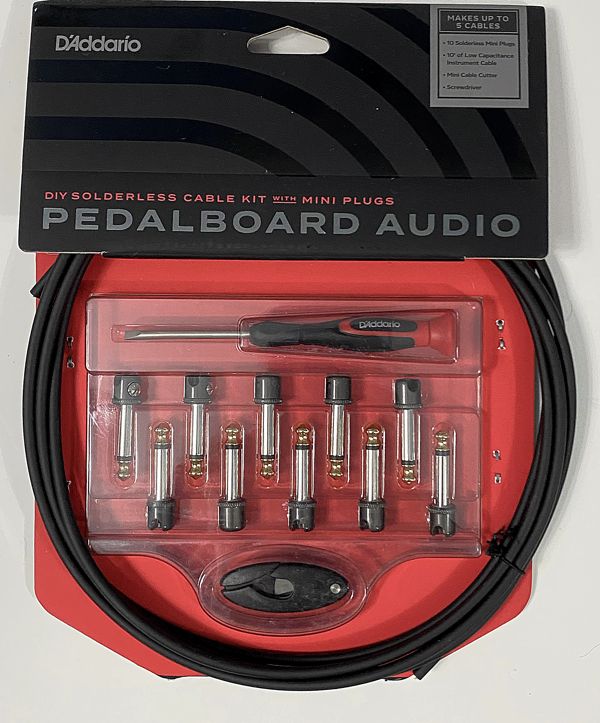
The D’Addario DIY Solderless Cable Kit with Mini Plugs allows you to create up to five custom-length cables for your pedal board or rack gear. The plugs can work for either straight or right angle connections, and the mini-plug form factor allows you to space your pedals close together on your pedalboard.
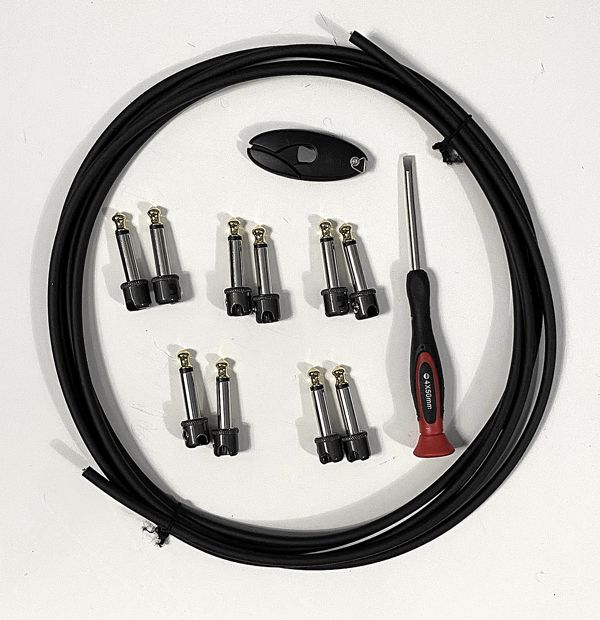
The kit comes with 10 individual plugs and 10 feet of cable. You also get a D’Addario-branded flathead screwdriver and a cable cutter. It is essential that you make clean cable cuts–I found that using my own wire cutters created cleaner cable cuts than the included cutter.
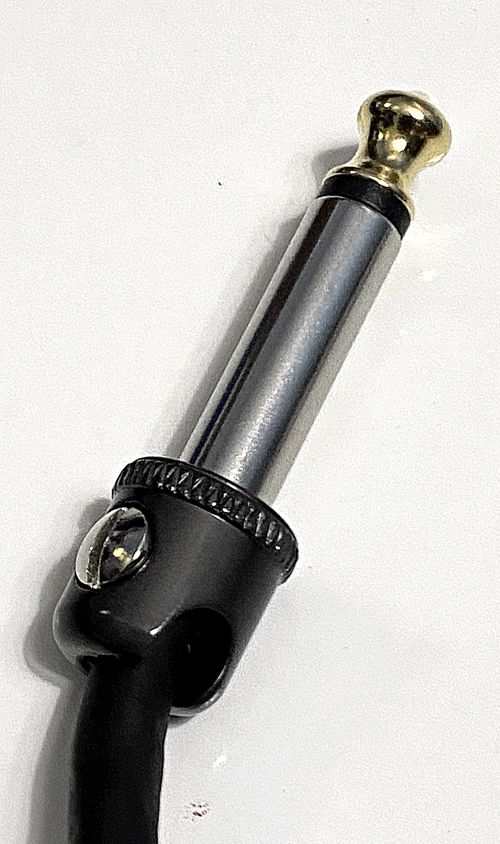
No soldering is needed–everything you need to create the cables comes in the kit, though you might want to use a multimeter to ensure you have correct electrical conductivity. Each cable is made of a center conductor, an insultator, an outer conducting shield/ground, and an outer jacket. Each plug has one gold tip and one silver sleeve, and each plug comes with a set screw to crimp the cable and plug together and to complete the electrical connection between the cable’s ground and the plug’s sleeve.
Here are the steps to create a cable:
- Measure how long you want your cable to be–cut a segment of cable to the desired length.
- Remove the set screw from each plug.
- Insert one end of the cable into one of the plugs–the cable must be completely inserted and a slight twisting motion can help.
- [OPTIONAL] Test the conductivity between the tip of the plug you just attached and the exposed center conductor of the free end of the cable with a multimeter.
- Completely tighten the plug’s set screw.
- Insert the second plug to the other end of the cable.
- [OPTIONAL] Test the conductivity between the tip of the second plug with the tip of the first plug.
- Tighten the set screw of the second plug.
- [OPTIONAL] Test the conductivity between the sleeves of both plugs, and make sure there is no short between the tips and the sleeves.
If you don’t have a multimeter of course you can skip the OPTIONAL steps and just plug in your created cable to see if it works, but the OPTIONAL steps can help you debug conductivity issues more quickly–if you don’t have conductivity after an OPTIONAL step that means you should readjust the plug or remove the plug, trim off a bit of cable, and try again. Once you get the hang of it you can create cables very quickly.
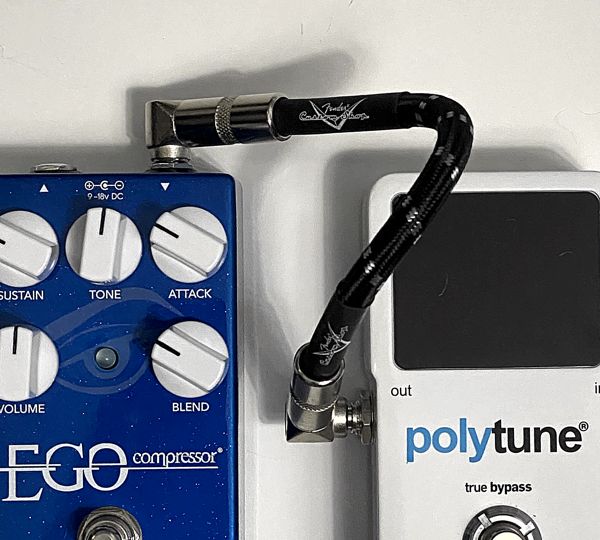
Commercial, set-length cables often create bulky, messy pedalboard layouts, since the extra lengths of the cables can arc into the air, catch on things, or interfere with your foot stomping your pedals.
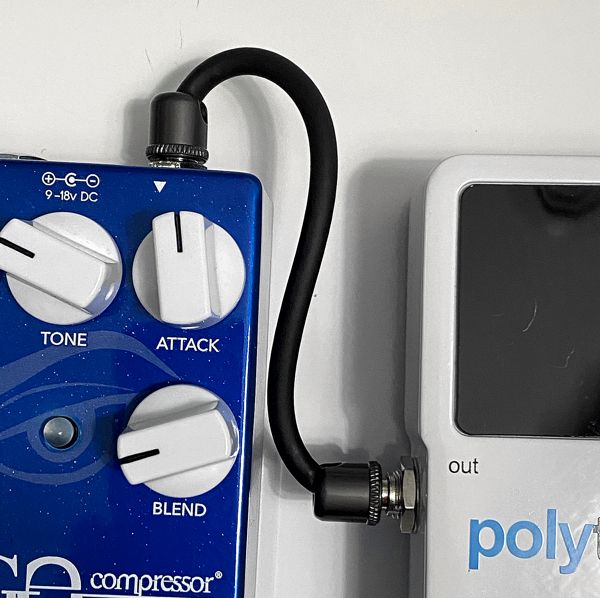
Overall the real value of this kit is the ability to create custom-length cables–especially with the mini-plugs I can create more compact and much cleaner pedalboard layouts than with sets of commercial, set-length pedal cables. The cables are very thin–this is good in that they are not bulky and are more flexible than thicker cables, allowing you to stack your pedals close together. However, because of the cable thinness and the fact that the plugs are only mechanically connected to the cables (i.e., they are not soldered), I’m not sure I would use these cables on the road unless the pedals were velcroed to the pedalboard. I think these cables are best used to create a compact pedalboard setup that you don’t often need to tear down or change around. With the D’Addario DIY Solderless Cable Kit with Mini Plugs you can create your own custom cables and dream pedalboard layout without having to solder! That’s a big win.
- Pricing and Availability on Amazon: D’Addario DIY Solderless Cable Kit with Mini Plugs
NOTE: I am an independent product reviewer–if I don’t like the product I say so, and if I do like the product I say so. If you end up purchasing something from a link on my site, I may receive, at no additional cost to you, a small commission. Thank you for your support!