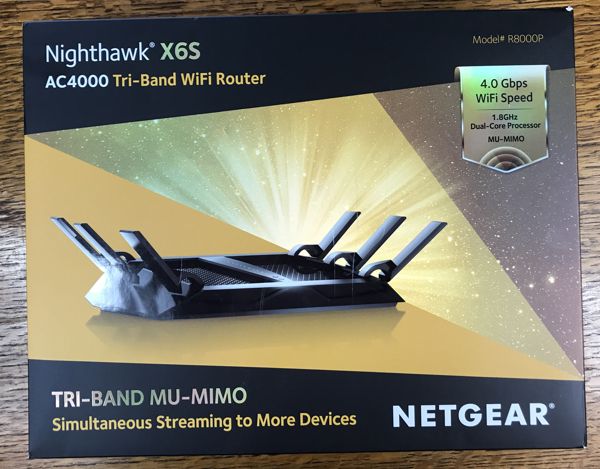
The NETGEAR Nighthawk X6S AC4000 Tri-band Gigabit WiFi Router is a race horse for home networking–there is a lot of functionality is this new access point (AP). However, note that it is probably not the router to purchase for your “average” home user because the setup is not entirely plug-n-play; plus many of the features and flexibility will go unused unless you are a power user. But, for the right use-case, this AP is a good choice, and for those cases the extra cost is justified.
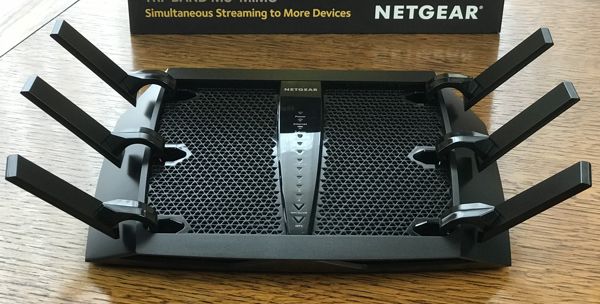
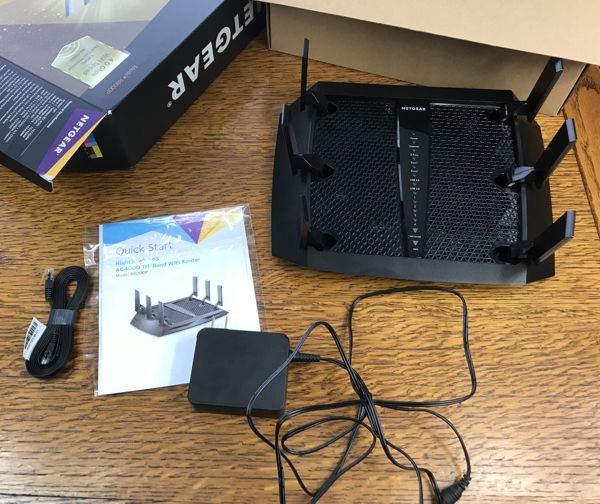
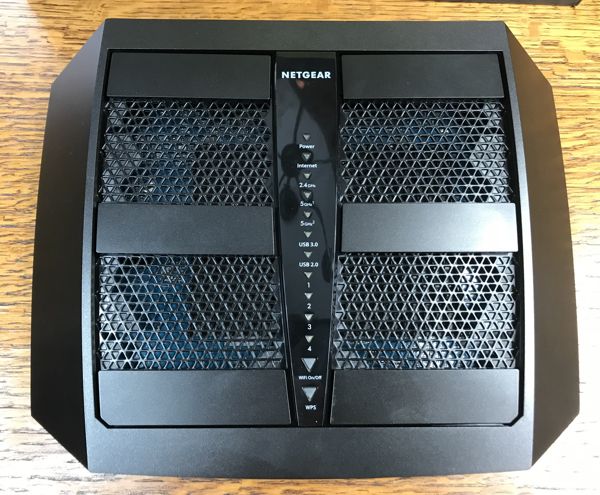
Everything comes well packaged in the box. The contents include the AP, quick guide, power adapter, ethernet cable, and a “please update firmware” warning insert. The antennas swivel into place–it is not a best practice (according to them) to leave them down.
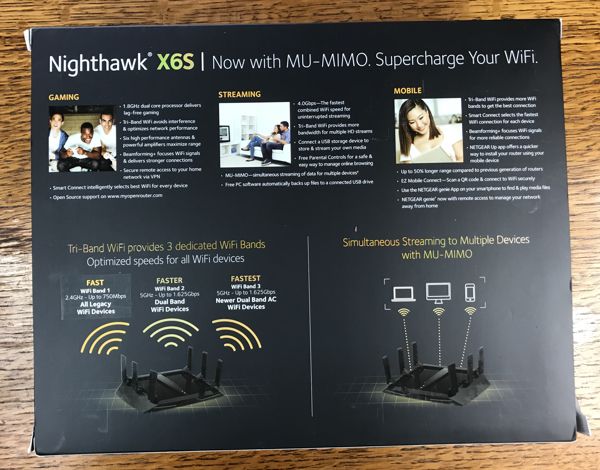
The router boasts being able to serve a large WiFi load via its “TRI-BAND MU-MIMO WIFI”. Basically this means simultaneous streaming to multiple devices. Considering it is so much easier to have WiFi than to cable your home with ethernet plugs, this can be very useful for a family with very good (25+ Mbit/s) internet and owning lots of devices (phones, tablets, laptops, and desktops) accessing the internet simultaneously. I’m being careful to point out that you need the good internet bandwidth too, because if your cable modem is a streaming bottleneck then many of the features of this router will go unused.
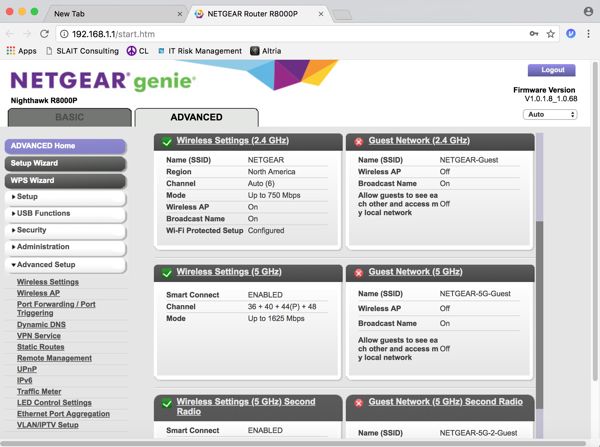
The router also boasts six WiFi antennas (two are 2.4 GHz for older and IOT devices and four are 5.0 GHz for the latest technology devices). Strangely, Netgear decided to label three of these antennas as “guest networks”. But, if you check the checkbox on the setup screen labelled, “Allow guests to see each other and access my local network” under Basic | Guest Network, then the antennas function as regular networks. Anyway, what I liked about these antennas was that I could setup six different SSIDs and put different devices on them. This means I can disable a particular SSID without affecting the functionality of the others; and I can have different passwords on these SSIDs. For example, I think this is a convenient setup when testing devices and functionality, such as in a home lab, and also when setting up IOT devices that I might want to quarantine some of the time. If having multiple SSIDs does not thrill you, you can bundle the antennas together by checking the “Enable Smart Connect” checkbox under “Wireless Setup”.
The initial AP setup process did not go as planned. Setup was supposed to be as follows:
- Remove power from modem.
- Connect ethernet from modem to AP.
- Connect power to AP, then power to modem.
- Connect from your laptop via WiFi or ethernet to AP (note: default SSID and password are on underside of AP)
- Open javascript enabled browser and surf to http://routerlogin.net or http://192.168.1.1
- Login as admin / password
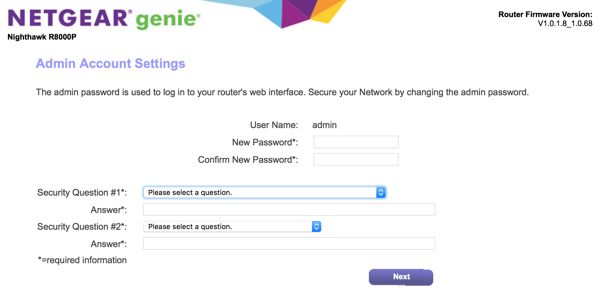
- Respond to the first screen and setup a new password and security questions (see screen)
- Use the “Setup Wizard” to set up connectivity
- Use Advanced | Administration | Firmware Upgrade | Check to upgrade to the latest firmware revision
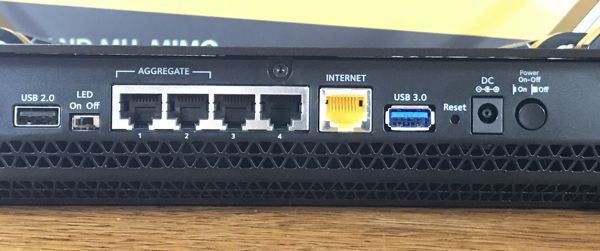
My first problem following these simple setup instructions was that I was unable to get either the WiFi or the ethernet to hand my Apple MacBook a DHCP address. I was getting frustrated, when I recalled reading about a reset button. On the back of the AP are the following: USB 2.0, Switch: LEDs on and LEDs off, four ethernet LAN ports, Ethernet WAN port (yellow), USB 3.0, Reset switch, Power cable (Power is not USB), and Power button. I used a paper clip to press the reset switch with the AP powered on, waited about three seconds until the power LED started flashing, and released the reset switch. About five minutes later, both the WiFi and Ethernet were correctly providing DHCP to my laptop.
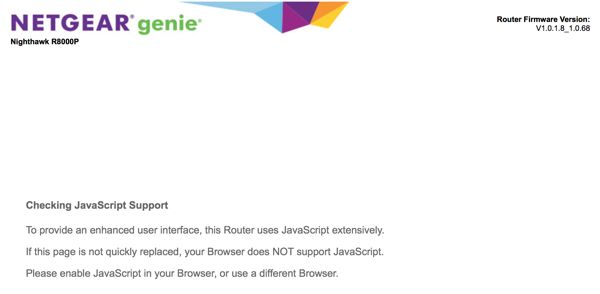
My second problem following these simple setup instructions was that my default browser (Safari) did not support javascript, and so I received an error. This was a definite negative regarding this AP: in my opinion they should be coding in HTML5 not javascript.
So, I moved to the Chrome browser and was able to setup the AP without further issues. The interface is organized into two tabs: Basic and Advanced. There are a lot of options in these tabs, and I want to highlight a few of the good ones. But, I also want to complain that in order to save changes, you must click the Save button on every single window. And, each time you save, the AP reboots. I would have preferred if the Save button only saved the configuration change without applying it, and if a reboot button would have allowed me to control when to apply changes and reboot.
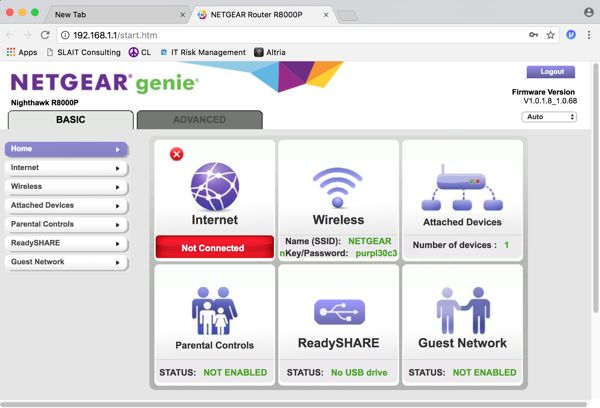
One thing I liked was the ability to easily see the attached devices, select one of them, and then goto “Access Control” to block anything you don’t want on the network. This means if your child is hogging the Internet, you can just kick them off! No, seriously, it’s good to see what devices are on your network. On the other hand, I did not get much value from the “Parental Controls” settings, which popup a dialog that accesses the Netgear website.
On the Advanced tab, you can setup those USB ports to either: a) share a USB printer on your WiFi, b) share a USB drive as a network share on your WiFi, or c) share a USB drive as a Windows backup target. This might be useful if you have older devices that need to be network enabled. Personally, I already own a network enabled printer and network-attached-storage (NAS) so this functionality was not useful to me. This functionality is similar to the Apple Extreme AP.
The AP defaults to having some basic options enabled, which can be disabled (and I don’t recommend that) in the “WAN Setup” section. But, I was looking to block FTP and telnet ports, for instance. Under “Security” you can enable MAC filtering (aka Access Control), enable website filtering (aka Block Sites), enable blocking specific ports/protocols (aka Block Services), and enable a schedule. The latter allows you to program that certain websites or services are blocked only at certain times. Strangely, you can only define one schedule. So you cannot (a) block junior from accessing online games after 10PM and then (b) also block your spouse from accessing Netflix until 8PM. Also, you can either use the schedule or not use it. So you cannot (a) block FTP all the time and also (b) block Quake after midnight. So, anyway, the firewall functionality is present, but could use some flexibility improvements.
Overall, I think the NETGEAR Nighthawk X6S AC4000 Tri-band Gigabit WiFi Router is a solid WiFi access point. There were even more features than I was able to test, such as Alexa connectivity. I liked having the ability to turn off/on the AP without unplugging it. I liked being able to turn off the LED lights so you can use this in a bedroom without keeping yourself awake all night (the power button still glows solid). I liked being able to configure six SSIDs independently. I disliked the javascript programming which seemed to limit the browser support, and had a slow screen refresh rate when administering the unit. But especially for gaming, streaming, and IOT, this WiFi router is a very good option.
Availability and Pricing on Amazon: NETGEAR Nighthawk X6S AC4000 Tri-band Gigabit WiFi Router (aff)